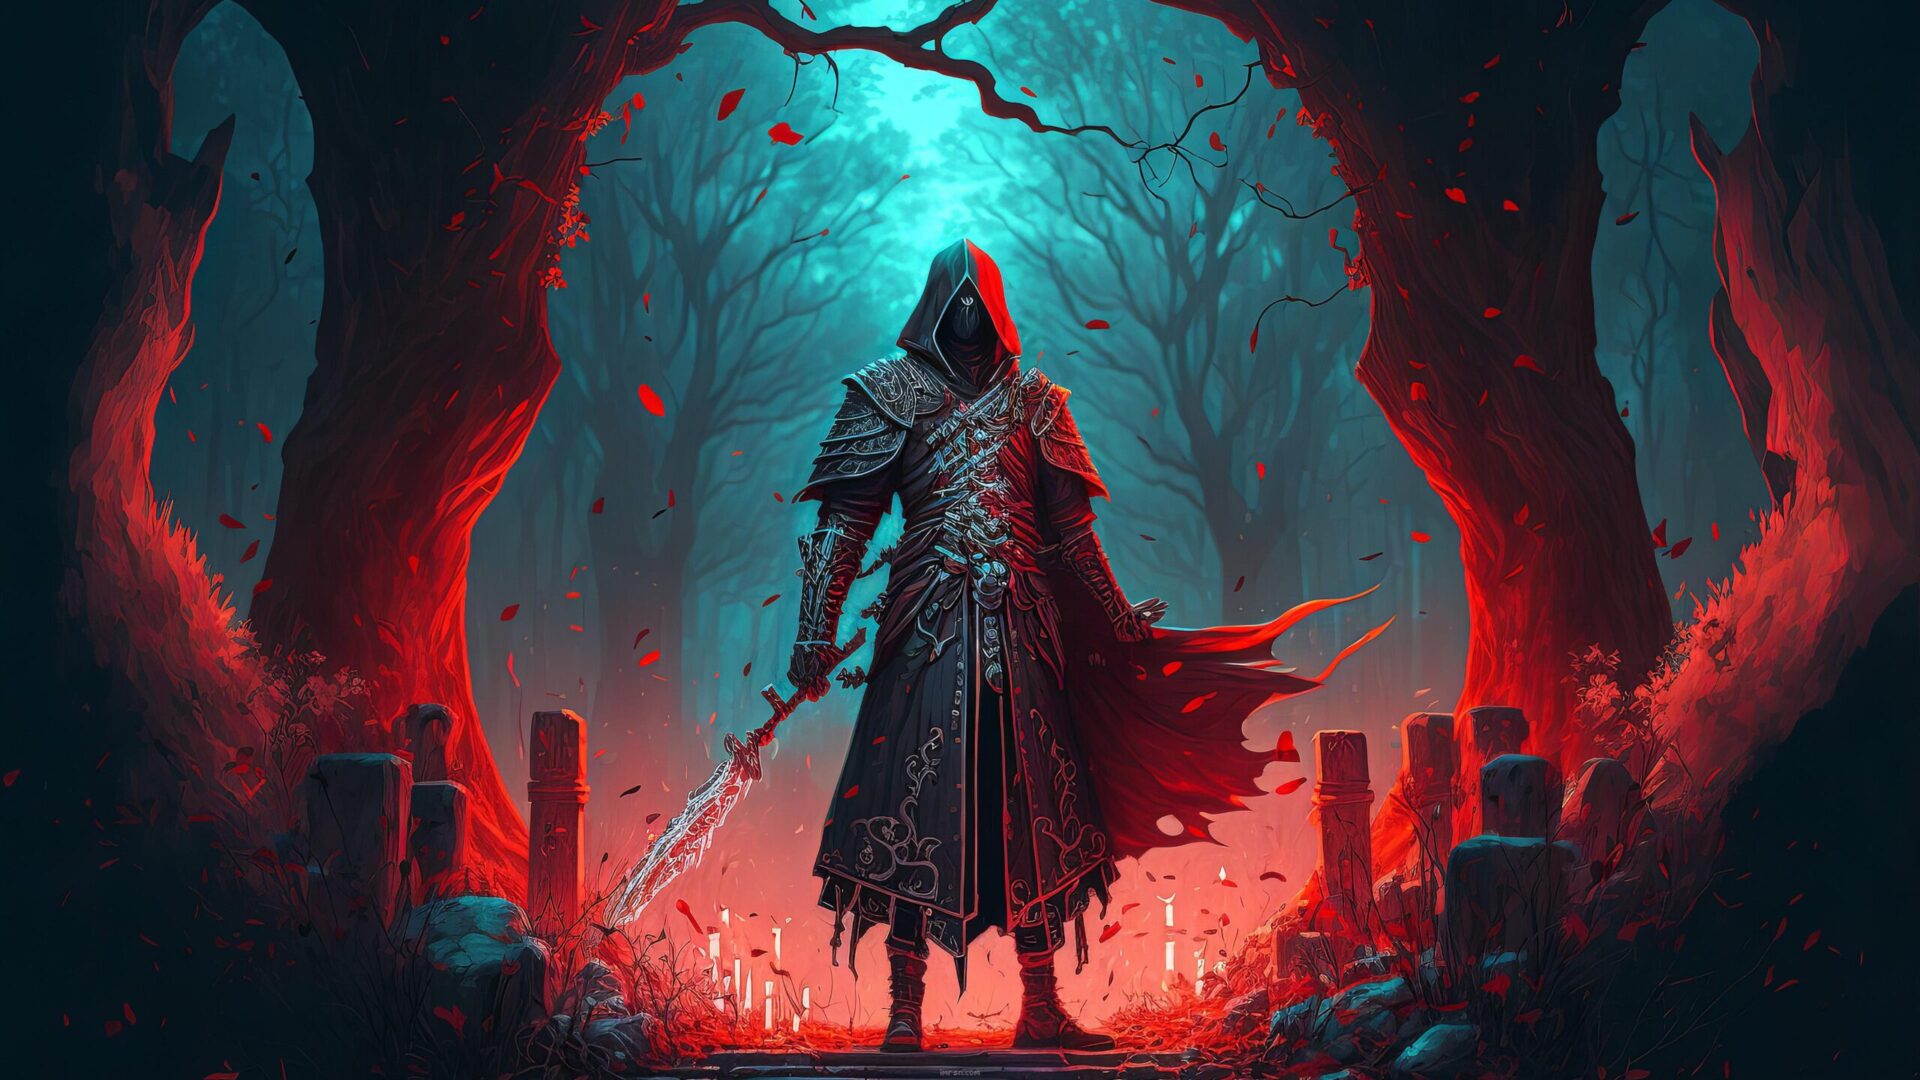
The Blood Lance Necromancer is one of the fastest-attacking builds in Diablo 4.
Rapidly throwing out a barrage of red spears, this build ramps up in damage and speed as you hit more and more enemies. It has solid damage, great Life sustain and a huge amount of Essence recovery to support our fast-attacking style.
The Blood Lance Necromancer relies primarily on the Blood Lance Core Skill and can be played mostly as a one-button build.
This comfortable playstyle allows you to just cruise through dungeons, without having to execute any combos or rotations. Because of our great Essence regeneration, we don't even use our Basic Skill, so we can focus on dealing damage Crowd Controlling enemies and avoiding damage from enemies.
Gameplay Showcase
Skills Overview
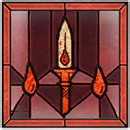
Blood Lance
This is our main skill which will deliver the damage. Even though It's a Core skill, with a proper setup we can cast it without any resource restrictions (even with a very fast Attack Speed which we're getting through various Aspects). It impales targets for up to 3 seconds, and the more targets you have impaled the more damage it does, so try to spread them around and hit different targets to increase your overall damage. After attacking with it six times, the next attack will be a guaranteed Overpower and will spawn an extra Blood Orb.

Reap
You won't need your basic skills at all with a proper setup, but before you get there you can use Reap for maximum Essence gain and the extra bonuses granted from its passives. It gives you extra Damage Reduction, Attack Speed and spawns a Corpse which can be used for Corpse Tendrils .

Corpse Tendrils
This skill allows us to manipulate the battlefield to our advantage. We will trigger it automatically through The Sacrilegious Heart as well as manually use it to Stun the enemies. You can choose to play with the Corpse Tendrils passive for extra Blood Orbs which synergize with our build very well or Corpse Tendrils for the extra Vulnerable uptime.

Corpse Explosion
Even though we are not scaling the Corpse Explosion damage, it helps us with a lot of useful synergies. With The Sacrilegious Heart, we will consume a Corpse every second, as long as there is one nearby. This will spawn extra Blood Orbs through Aspect of the Embalmer , recover Essence thanks to Grim Harvest passive and boost our damage through the Fueled by Death passive.

Bone Prison
The Bone Prison is included in this build mainly for a reliable source of Vulnerable, which is needed whenever you're fighting a tougher enemy. It will also help us recover some Essence and trap the enemies inside, letting us impale them all at the same time with the Blood Lance .

Blood Mist
This skill functions very well as a defensive cooldown. On demand Unstoppable and Immunity will make sure that you're safe in every situation. Because of how often our attacks Overpower, we'll be able to have a very short cooldown on this ability.
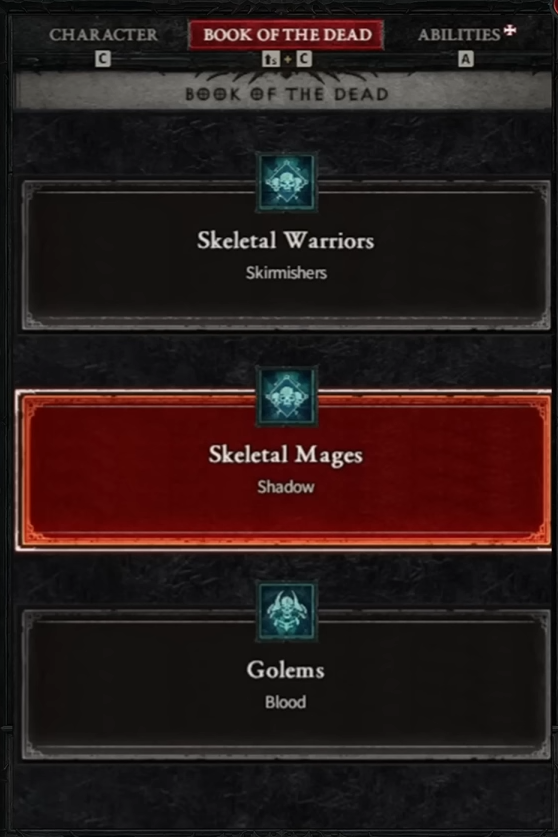
Book of the Dead
This build sacrifices all of the Minions in favor of passive bonuses.
- Skeletal Warriors
We sacrifice the Skirmishers for an extra 5% Critical Strike Chance to give us an offensive boost. - Skeletal Mages
We take the Bone sacrifice bonus for 40% increased Overpower damage. We have a reliable way of guaranteeing Overpower with our attacks to take a full advantage of this bonus. - Golem
We can sacrifice either the Blood Golem for extra Life (which also scales our Overpower damage) or the Bone Golem for extra Attack Speed which overall is the better option.
Malignant Hearts
The Barber
We have a couple of options for the Wrathful Heart. The Barber is the stronger one of the two in most situations. It will speed up your clear and overall make the build feel smooth, especially if you can get a low duration roll on it. However it does stop some of our synergies from working, and you won't be noticing as many Blood Lance 's flying at enemies as before. Despite blocking parts of our build from operating at full capacity some of the time, it still provides a general improvement to the build's damage and clear speed and is the strongest Wrathful Heart we can use.
Malignant Pact
If you want to see the full Attack Speed potential of this build, and feel like an anime character that activated his Super Speed, this Wrathful Heart would be the choice for you. Most of the time you will have a little bit slower clear speed than with The Barber, however when fighting multiple tough enemies that are close together, the combination of Blood Lance 's Aspects will spawn an incredible amount of projectiles per second and melt the enemies. The way Blood Lance interacts with Blood Orbs and Aspect of Hungry Blood , creates more and more projectiles the longer you attack against multiple targets in the same spot.

The Dark Dance
This Vicious Heart will alleviate some of the intense Essence cost demands of our Core Skill and let us spend our Life to attack instead. The Life cost is very small and the condition of being above 60% Life is very easily met. This version of the Blood Lance build has extremely good Life recovery because we're consuming Blood Orbs constantly.
The Sacrilegious
Another Vicious Heart, that is present in almost every Necromancer Build. Blood Lance's decent Lucky Hit chance combined with Hewed Flesh passive, gives us a constant supply of Corpses for this Heart to utilize. They enable a lot of useful synergies mentioned in the Skills Overview section and add to the overall power of the build, without requiring any additional input from you as a player.
Aspects
This build does not use any Unique items. We're fully utilizing all of our gear slots for Legendary Aspects.
There are a lot of synergies in this build that require multiple Aspects to function optimally. While you can play this build if you're still missing some of them, the build becomes exponentially stronger as you approach the full setup outlined below.
Helmet
- Aspect of Disobedience
Our Blood Lance reaches very high Attack Speed and hits multiple enemies. This will lets us stack this Aspect very quickly and gain a lot of Armor. This is the main defensive aspect we'll be using and you can put it on Helmet, Chest Armor or Pants, so keep a high roll version of Aspect of Disobedience for whenever you find a very good item in one of those slots.
Chest Armor
- Aspect of the Protector
The second defensive aspect we'll be using in this build is Aspect of the Protector. Whenever you're fighting Elite monsters, you want to just stand still and spam your Blood Lance . Having to move away and dodge their attacks would hurt our DPS uptime. This Aspect will make us tanky whenever fighting Elite monsters.
Gloves
- Blood Seeker's Aspect
This Aspect will increase your damage, depending on how many monsters are impaled with the Blood Lance . That's why you want to spread your attacks a bit, to gain this additional multiplier. The more monsters you can hit at the same time, the more damage you will deal to the first enemy hit by each projectile.
Pants
- Aspect of the Embalmer
Consuming Blood Orbs gives us great Life sustain, Essence recovery, Fortify and additional clear from Gore Quills Aspect. Since we're constantly consuming Corpses through The Sacrilegious Heart , this Aspect allows us to spawn more of them, to facilitate all of those synergies.
Boots
- Wind Striker Aspect
This Aspect will boost our Movement Speed and in turn the overall clear speed. Despite not having very high Crit Chance, we're hitting enemies very quickly, allowing us to stack this buff reliably.
Weapons
- Aspect of Hungry Blood
On our main weapon, which should be a wand, we'll use the Aspect of Hungry Blood. It launches additional Lances as long as we're hitting a target that is already impaled by one of them. This improves our clear speed and helps us trigger all of the Blood Lance synergies quicker, by shooting out more projectile attacks. - Accelerating Aspect
Going all-in on the Attack Speed scaling, we're adding the Accelerating aspect to our Off-hand Focus weapon. Just like with the Wind Striker Aspect, this Aspect will be always up if we're attacking monsters, because of how often we hit them. All of these Attack Speed Aspects also synergize with each other, because the faster we attack the easier it is to trigger them.
Amulet
- Aspect of Rathma's Chosen
This Aspect provides a huge amount of Attack Speed. We have a guaranteed way to Overpower with our Blood Lance , through the Supernatural Blood Lance passive. Because of that we can reliably keep this buff up. By putting this on an Amulet, we're getting 75% increased Attack Speed instead of 50%, which is a massive difference.
Rings
- Gore Quills Aspect
This is a very important piece of the build. Any nearby Blood Orbs will be consumed by it whenever you attack with Blood Lance, to spawn additional projectiles. Blood Orbs consumed this way, work exactly as if you've walked over them. They will heal you, Fortify, grant Essence etc. All of the Blood Orb synergies work with this Aspect, making this build incredibly comfortable to play. - Aspect of Potent Blood
With the massive amount of sustain from constantly consuming Blood Orbs, you'll be at full Life a lot of the time. As long as you have the rest of this build's setup correctly, all you need is the lowest roll of this Aspect which can be acquired in your Codex. Naturally the better roll will be beneficial if you want to invest less in Essence recovery somewhere else.
Item Modifiers
The Blood Lance Necromancer build relies on attacking rapidly and triggering Overpower with your attacks.
With that in mind, it makes sense to stack as much Willpower as possible. Willpower will increase our Essence Regeneration, boost our Overpower damage and increase Healing Received. All of these bonuses are valuable to our build. This is why you want to get Willpower and All Stats on every item you can.
The second priority is to stack as much Essence Cost Reduction stat as possible. You can get it on an Amulet, Boots and the Off-hand weapon.
Speaking of weapons, to maximize the Attack Speed and have access to the Essence Cost Reduction and Essence recovery modifiers from a Focus, we'll be using a Wand in the main hand and a Focus in the off-hand slot.
| Equipment | Best-in-Slot | Good Stats |
| Helm | - Willpower - All Stats - Maximum Life - Total Armor | - Intelligence - Damage after picking up a Blood Orb |
| Chest | - Willpower - All Stats - Maximum Life - Total Armor | - Damage Reduction - Damage Reduction while Fortified - Fortify Generation |
| Gloves | - Ranks of Blood Lance - Attack Speed - Lucky Hit: Chance to Restore Essence - Lucky Hit Chance | - Critical Strike Chance - Overpower Damage |
| Pants | - Willpower - All Stats - Maximum Life - Damage Reduction | - Total Armor - Damage Reduction while Fortified - Dodge Chance |
| Boots | - Movement Speed - Essence Cost Reduction - Willpower - All Stats | - Fortify Generation - Damage Reduction While Injured |
| Amulet | - Essence Cost Reduction - Movement Speed - Willpower - Ranks Of Coalesced Blood | - Damage reduction - Dodge Chance - - Ranks Of Fueled By Death |
| Rings | - Lucky Hit Chance - Maximum Life - Resource Generation - Overpower Damage | - Critical Strike Chance - Fortify Generation - Vulnerable Damage |
| Wand | - All Stats - Intelligence - Core Skill Damage - Overpower Damage | - Vulnerable Damage |
| Focus | - Essence Cost Reduction - Lucky Hit: Chance to Restore Essence - Lucky Hit Chance - Maximum Life | - Resource Generation - All Stats |
Gems
- Armor: Ruby
Maximum Life increases our Overpower damage, so we want to get as much of it as possible. Ruby is the obvious choice for this character, but with a good Fortify uptime you can also consider Sapphire for Damage Reduction while Fortified as a purely defensive option. - Weapons: Ruby
We don't need the sustain from Skulls, we don't Crowd Control enemies constantly and we don't have a very high Crit Chance. That essentially eliminates all other gem choices and leaves Ruby as the best option, giving us 24% increased Overpower damage per gem.
Skill Tree
You can find the Skill Tree HERE (powered by D4Builds.gg). Under the “Skill Tree” tab, make sure that you have the “Leveling Path” enabled to see the recommended order of Skill Point allocation.
- We put one point into Reap and path to the Reap to maximize the utility of our basic skill. We don't rely on it for damage, that's why we leave it with only one point.
- Next we pick Blood Lance and spec into Blood Lance to start generating Blood Orbs and guarantee Overpower.
- Take Blood Mist as soon as it's available for a reliable source of Unstoppable.
- Afterwards we take Bone Prison for guaranteed Vulnerable.
- Max out Blood Lance and take the Death's Reach passive to increase our damage
- As soon as we can, we take Corpse Tendrils . We need just one point in Corpse Tendrils , because we're using it only for the utility, not for the damage.
- Afterwards, we're going to start taking the Blood Skills cluster, starting with one point in Gruesome Mending and 3/3 Coalesced Blood .
- Next we take all Minion related passives that affect us as a player: 3/3 Inspiring Leader , 3/3 Stand Alone , 3/3 Memento Mori .
- For the Key Passive we take Rathma's Vigor , because we don't benefit from any other Key Passives, so the choice here is obvious.
- After picking 3/3 Drain Vitality , it's time to pick up our Corpse related passives to enable those synergies: 3/3 Hewed Flesh , 1/5 Corpse Explosion , 3/3 Grim Harvest , 3/3 Fueled by Death , 3/3 Necrotic Carapace .
- Lastly we finalize the build by picking up Tides of Blood , Blood Mist and Unliving Energy for a bigger Essence buffer.
Paragon Boards & Glyphs
The Blood Lance Necromancer build uses five Paragon boards. We do not get as much benefit from Legendary Passives and Glyphs as some other builds, but we can take advantage of a lot of strong Magic Passive nodes that are present on many of these Paragon Boards.
You can also find the full Paragon setup you can follow HERE (powered by D4Builds.gg).

Starting Board
On the Starting Board we pick up most of the Magic Passives, all Rare Passives and slot in the Blood-drinker-necromancer Glyph. This will grant us extra Fortify whenever we consume Blood Orbs with the Gore Quills Aspect . You only need enough Intelligence in the Glyph radius to activate that bonus. You can skip the rest of Intelligence nodes because we can spend those Paragon points much more efficiently in other places.

Blood Begets Blood
The second board features a useful Legendary Passive - Blood Begets Blood. It grants up to 15% increased damage when consuming Blood Orbs, which we do constantly. We path through a lot of good Magic nodes on this board and split the path toward two other Paragon Boards. Our Glyph in this board is the Imbiber-necromancer . The Potion Healing bonus is virtually useless, because we constantly heal ourselves with Blood Orbs, but for the same reason, we can reliably benefit from the damage increase while Healthy (which means while we're above 80% Life).
Scent of Death
This board has a lot of Willpower in Glyph radius and provides decent generic bonuses from other nodes in that area. We use this board to support the Undaunted-necromancer Glyph. With many sources of Fortify, we can keep it up most of the time, and get a huge additive bonus to our damage. The secondary Damage Reduction bonus is also great defensively.

Bloodbath
This Paragon Board has a large amount of passives that synergize with this build. Five Rare nodes, five clusters of Magic nodes and a useful Legendary passive that grants 50% increased Overpower damage. Damage while Healthy, Damage while Fortified and Fortify Generation are all useful to us, and this board has an abundance of these stats. We use the Dominate-necromancer Glyph in here, which increases our Overpower damage further and gives us an additional damage multiplier after we've hit an enemy with an attack that Overpowers.
Bone Graft
The final board in our setup is Bone Graft. The main reason for picking it up are the Essence related passives. You can consider using this board earlier and changing the setup to this one once you get most of your Paragon points if you struggle with Essence. The Essence on Kill and Maximum Essence helps with our Blood Lance cost a lot. In the Glyph socket we can put the Exploit-necromancer . Make sure to pick up enough dexterity to enable the secondary bonus.
Gameplay Tips
- Spread your Lances around by attacking multiple nearby targets. It will multiply the damage you're dealing with each of your Blood Lance .
- Actively use your Corpse Tendrils and Bone Prison to Crowd Control the monsters and keep up Vulnerable on tough targets.
- You can tank a lot of damage by just continuously attacking enemies. The more you attack the more Blood Orbs you will spawn and the more healing you will receive.
The Blood Lance Necromancer is a fast and enjoyable build to play.
With high sustain and an easy, one-button playstyle, you can blast through dungeons at a good pace, without having to micro manage your character too much. Simply shoot at everything you see and watch all of the red spears flying around, killing everything in sight.